Appearance
Settings
Settings centralises user accounts, roles and permissions, tags, and bulk class migrations. Choosing Settings in the sidebar opens User Management first; a pill tab bar switches between the four sub-apps without losing context.
Purpose and outcomes
- Provision users, send invitations, deactivate accounts.
- Define custom roles and attach fine-grained module + action permissions.
- Manage tags applied to clubs/clubbers for programmes and recognition.
- Launch global class migrations with preview dialogs before committing.
Who it is for
Each tab checks permissions for that area (users, roles, tags, migrations). In many deployments only Root users pass all checks—confirm via your access matrix.
Tabs
| When you open… | You see… |
|---|---|
| Settings (default) | User Management |
| User Management tab | User accounts |
| Role and Permissions tab | Roles and permission matrix |
| Tags Management tab | Programme and award tags |
| Migrations Management tab | Bulk class migrations |
User Management
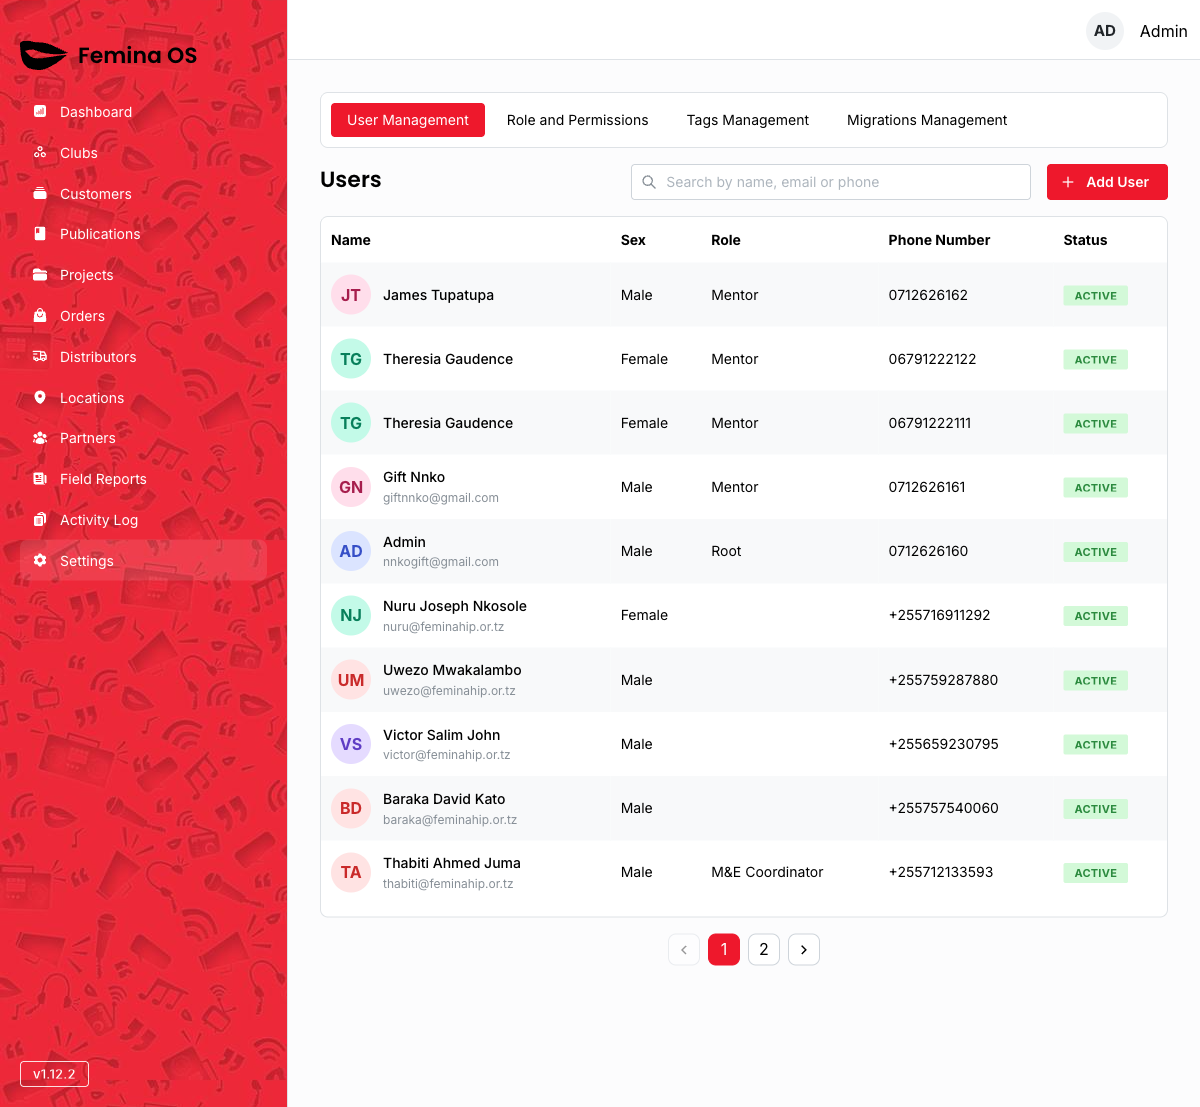
Screenshot: Pill tabs with User Management active, search field, Add User button, users table.
Add / edit user
Add User and row actions open a user form (dialog or drawer—capture what your build shows).
Screenshot: User form with name, email, phone, sex, role select, active toggle, Save.
User details drawer
The user details drawer shows a read-only summary and actions (edit, deactivate).
Screenshot: Drawer with user profile header and danger zone actions.
Deactivate confirm
If the flow uses a confirmation dialog, capture it.
Screenshot: Confirm deactivate dialog with red confirm.
Role and Permissions

Screenshot: Roles table, Add role button, expandable rows.
Role details drawer
The role details drawer lists permissions grouped by module.
Screenshot: Drawer listing modules with selectable permission chips.
Add / edit role dialogs
Add role, edit role, and add/remove permission flows combine dialogs and inline forms.
Screenshot: Role form dialog (name, key, description).
Screenshot: Add-permission dialog with module and action multi-select.
Permission selector
Complex nested UI—document each level (module group, action checkboxes).
Screenshot: Permission selector expanded for Club module showing list, read, create, update, delete, and “all” options as implemented.
Tags Management

Screenshot: Tags table, Add Tag, search, row actions.
Tag drawer and club assignment
The tag details view and link clubs to tag actions may open dialogs to attach clubs.
Screenshot: Tag detail drawer with linked clubs table.
Screenshot: Dialog to add clubs to a tag with search and confirm.
Migrations Management

Screenshot: History table, Global migrate split button.
Global migrate
Global migrate opens a menu of class levels, fetches a preview from the server, then shows a confirmation dialog with step-by-step counts.
Screenshot: Menu expanded showing class-level options.
Screenshot: Migration confirmation dialog with preview counts, year metadata, Confirm migrate and cancel.
- Outcome: Starts the bulk migration; notifications report errors; the history table refreshes when complete.
Per-club migration
See Clubs → Migration tab for club-scoped jobs; Settings page focuses on global operations.
Workflows
Onboard a new coordinator
- User Management → Add User.
- Fill profile; assign role with Publications + Orders read permissions.
- Save; verify they receive the invitation email (if enabled).
Create a custom read-only auditor role
- Role and Permissions → Add role.
- Name it
auditor; add LIST/READ permissions on required modules only. - Save; assign to a user.
Run end-of-year promotion
- Migrations Management.
- Global migrate → pick class track.
- Review preview dialog counts.
- Confirm; monitor notifications and history table.
FAQ
Why do I always land on User Management?
The app sends you straight to the User Management tab so administrators reach account tasks in one click.